Video editing involves several stages that transform raw footage into a polished, engaging video. Understanding the difference between a rough cut and a final cut helps creators organize their work, reduce unnecessary revisions, and improve storytelling. Each stage serves a specific purpose, from arranging clips to refining transitions, audio, and visual elements.
With AI-powered tools such as InVideo Editor, editors can simplify repetitive tasks and build a more efficient video editing workflow. These tools help creators save time, experiment with different editing styles, and focus on delivering clear, engaging stories. By understanding each editing stage, beginners and professionals can produce high-quality videos with greater confidence.
Quick Answer
A rough cut is the initial version of a video, created by arranging selected clips into a basic sequence. A final cut is the approved, polished version ready for delivery or publication. Between these stages, a fine cut improves pacing, continuity, and timing before final audio, visuals, and quality checks are completed.
Key Takeaways
- A rough cut establishes the initial story and arranges selected clips into a sequence.
- A fine cut improves pacing, timing, continuity, and transitions.
- A final cut represents the approved, polished version of a video.
- AI can assist with footage organization, transcription, clip selection, and repetitive editing tasks.
- Human editors remain essential for creative decisions, emotional storytelling, and quality control.
- A structured video editing workflow helps reduce revisions and save production time.
- InVideo Editor is worth exploring for creators seeking AI-assisted video editing capabilities.
What Is a Rough Cut in Video Editing?
A rough cut is the first structured version of a video created after reviewing and selecting raw footage. It focuses on storytelling rather than visual perfection. Editors arrange clips, remove unnecessary scenes, and establish the video's basic flow. This stage helps teams evaluate the overall direction before investing time in detailed editing.
Understanding the Purpose of a Rough Cut
The primary purpose of rough cut editing is to establish a clear narrative using the available footage. Editors determine which scenes communicate the intended message and how they should appear in sequence. This early version also allows clients and stakeholders to review the structure and request important changes before production moves forward.
What Does a Rough Cut Include?
A rough cut typically includes selected clips, basic scene sequencing, temporary audio, and an initial storyline. Some edits may contain placeholder graphics, incomplete transitions, or unfinished sound. The goal is to communicate the video's message rather than deliver a perfectly polished result.
- Selected footage arranged in sequence.
- Basic dialogue and temporary audio.
- Initial pacing and scene transitions.
- Placeholder titles or graphics where needed.
When Should You Create a Rough Cut?
Create a rough cut after importing, organizing, and reviewing the source footage. It is especially useful for marketing videos, interviews, tutorials, advertisements, and documentaries. By reviewing the story early, editors can identify missing information, remove unnecessary scenes, and avoid spending time polishing footage that may later be removed.
What Is a Final Cut in Video Editing?
A final cut is the approved version of a video after the necessary editorial decisions and revisions have been completed. It contains the intended scene sequence, refined pacing, finalized audio, completed graphics, and consistent visuals. Before delivery, editors check technical quality and confirm that the video meets the project's requirements.
Understanding the Final Cut Stage
The final cut stage focuses on completing the video and preparing it for its intended audience. Editors incorporate approved feedback, refine remaining details, and ensure that the content communicates its message effectively. Depending on the production workflow, additional finishing tasks may follow editorial approval before the final file is exported and delivered.
What Does a Final Cut Include?
A final cut includes carefully timed scenes, consistent color, balanced audio, completed titles, and appropriate transitions. Captions, logos, and visual effects are checked for accuracy and consistency. Editors also verify resolution, aspect ratio, and export settings to ensure the video looks and sounds correct on its intended platform.
- Final scene timing and transitions.
- Color correction and grading.
- Balanced dialogue, music, and sound effects.
- Completed titles, subtitles, and graphics.
- Export settings and quality assurance.
How Do You Know a Video Is Ready for Final Cut Approval?
A video is ready for final approval when its story, sequence, and major creative decisions have been accepted. Requested revisions should be addressed, and the visuals and audio should meet the agreed standards. Reviewing the entire video from beginning to end helps catch continuity errors, spelling mistakes, audio issues, and export problems.
Rough Cut vs Fine Cut vs Final Cut: Key Differences
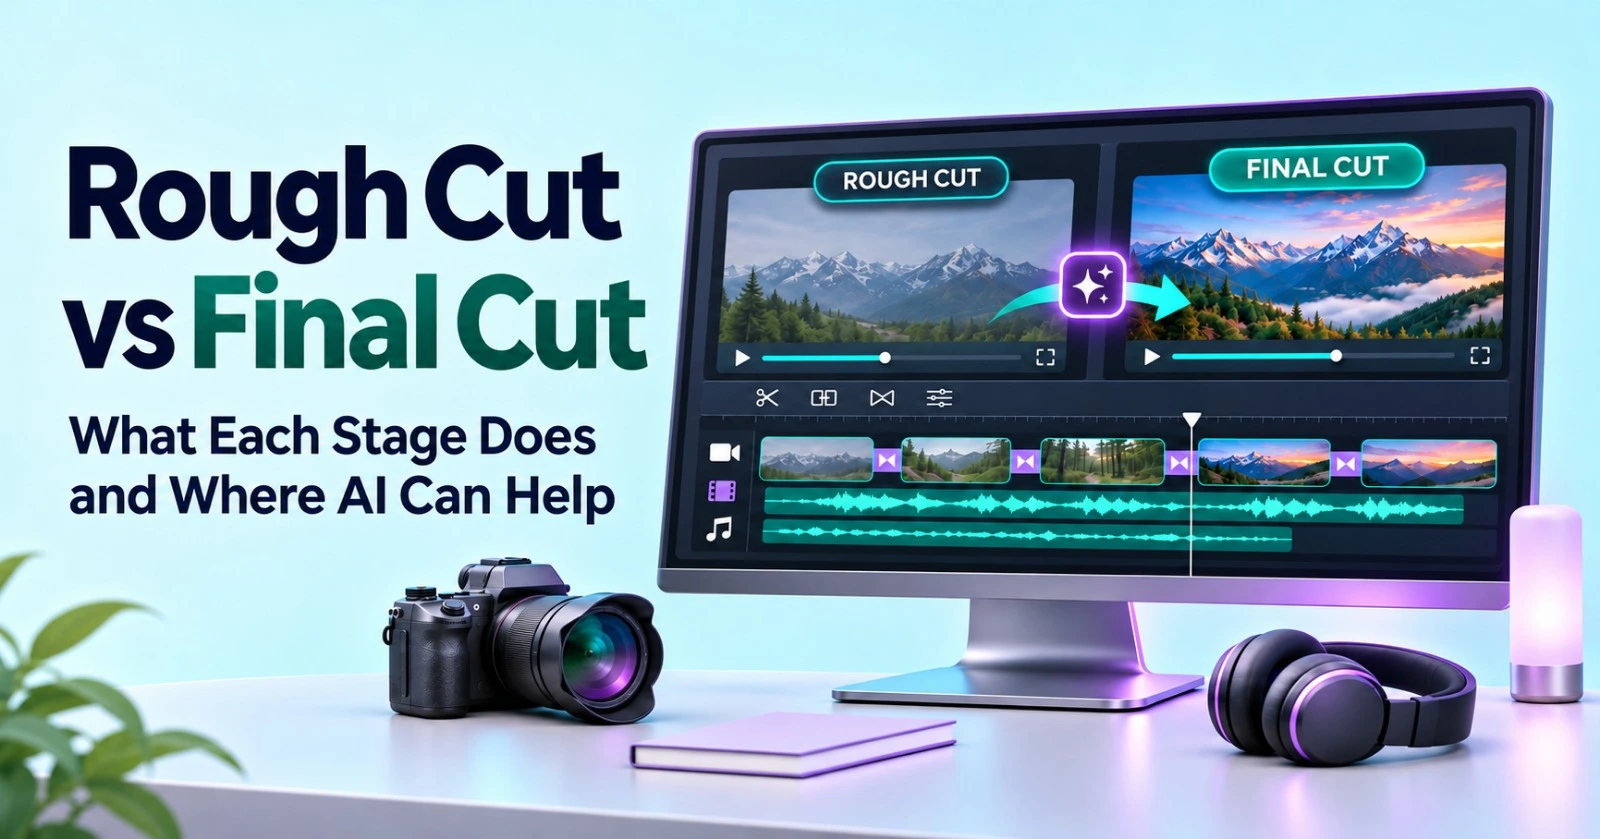
Rough cut, fine cut, and final cut represent different stages of the editing process. The rough cut establishes the story, the fine cut refines the sequence, and the final cut completes the approved edit. Understanding these differences helps editors allocate their time effectively and decide when to request feedback or begin finishing work.
Rough Cut vs Fine Cut
A rough cut establishes the initial arrangement of scenes, while a fine cut improves the timing and flow of those scenes. During fine cutting, editors remove unnecessary pauses, adjust clip lengths, strengthen transitions, and improve continuity. The objective is to make the story feel deliberate and engaging without changing its core message unnecessarily.
Fine Cut vs Final Cut
A fine cut is a refined editorial version that may still require approval or finishing work. A final cut represents the approved edit, with the necessary creative decisions completed. Depending on the production workflow, color grading, sound mixing, visual effects, and export preparation may happen after the fine cut is approved.
Rough Cut vs Final Cut Comparison
|
Feature |
Rough Cut |
Fine Cut |
Final Cut |
|---|---|---|---|
|
Main Purpose |
Establish the story and basic structure |
Refine pacing, flow, and continuity |
Complete the approved video edit |
|
Clip Selection |
Initial selection of usable footage |
Carefully reviewed and refined clips |
All clips approved and finalized |
|
Transitions |
Basic or temporary transitions |
Adjusted for smoother scene changes |
Fully polished and completed |
|
Audio |
Temporary music and basic sound |
Improved timing, clarity, and balance |
Final mixing and quality checks |
|
Visual Effects |
Basic effects or placeholders |
Effects refined where needed |
All required effects completed |
|
Editing Focus |
Storytelling and sequence arrangement |
Timing, continuity, and precision |
Quality control and final approval |
|
Color Correction |
Minimal or temporary adjustments |
Initial color corrections |
Final color grading completed |
|
AI Assistance |
Automatic clip selection and rough assembly |
AI-assisted trimming and audio cleanup |
AI-assisted quality checks and export preparation |
|
Output |
Initial working version |
Near-final edited video |
Approved video ready for delivery |
What Are the Main Stages of Video Editing?
The video editing process transforms raw recordings into a coherent final product through a series of connected steps. Although individual workflows vary, most projects involve organizing footage, selecting clips, creating a rough cut, refining the edit, completing finishing tasks, and exporting the video. Following these stages helps improve consistency and reduce avoidable revisions.
Step 1: Import and Organize Raw Footage
Organize all video clips, audio recordings, images, and graphics into clearly labeled folders. Proper file management helps editors locate assets quickly, avoid missing files, and maintain an efficient video editing workflow throughout the project.
- Collect all project assets.
- Create clearly named folders.
- Group footage by scene or date.
- Check files for accessibility.
Step 2: Review Footage and Select the Best Clips
Review the available footage and select clips that communicate the intended message effectively. Removing duplicate, irrelevant, or unusable recordings helps simplify the timeline and makes rough cut editing faster, clearer, and more organized.
- Watch and evaluate each recording.
- Select the strongest takes.
- Remove unnecessary or duplicate clips.
- Identify key dialogue and moments.
Step 3: Create the Rough Cut
Arrange selected clips into a logical sequence that communicates the main story. Focus on structure and essential content rather than minor details, ensuring the rough cut provides a clear foundation for further editing and feedback.
- Arrange clips in story order.
- Add essential dialogue and audio.
- Include basic transitions when needed.
- Review the overall storytelling flow.
Step 4: Refine the Fine Cut
Improve the rough cut by adjusting pacing, continuity, and scene transitions. Remove unnecessary pauses and repetitive content while ensuring dialogue and visuals work naturally together. Feedback helps identify confusing sections before final editing begins.
- Improve scene timing and pacing.
- Remove repetitive information.
- Smooth transitions between clips.
- Incorporate relevant feedback.
Step 5: Complete Finishing and Quality Checks
Finalize the video's visual and audio elements to achieve a professional result. Apply consistent color correction, balance sound levels, verify captions, and review branding. Thorough quality checks help eliminate errors before exporting the finished video.
- Apply color correction consistently.
- Balance dialogue, music, and sound.
- Verify captions, titles, and graphics.
- Check branding and visual consistency.
Step 6: Export and Publish the Final Video
Export the completed video using settings appropriate for its intended platform. Check resolution, aspect ratio, frame rate, and file format to maintain playback quality. Reviewing the exported file helps ensure the video is ready for publishing.
- Select the appropriate export format.
- Confirm resolution and aspect ratio.
- Preview the exported video.
- Publish on the intended platform.
How AI Can Help at Different Stages of Video Editing
AI can support multiple stages of video editing by reducing repetitive work and helping creators locate useful content faster. Depending on the software, features may include automatic transcription, scene detection, caption generation, silence removal, and AI-assisted clip assembly. These capabilities can accelerate editing, but they do not guarantee a coherent or publication-ready video.
AI for Footage Organization and Clip Selection
AI-powered editing tools can help identify spoken words, detect scene changes, and organize recordings into searchable collections. These capabilities are especially useful when working with long interviews, webinars, podcasts, or customer testimonials. Editors can spend less time searching through footage and more time selecting the moments that support their storytelling goals.
AI for Rough Cut Editing
AI-assisted rough cut editing can help assemble an initial sequence by identifying relevant content and removing selected unwanted sections. Transcript-based editing may also allow creators to make changes by editing recognized speech. The available automation depends on the tool, source material, and instructions provided, so the resulting sequence should always be reviewed.
AI for Fine Cutting and Final Polishing
During fine cutting and finishing, AI can assist with tasks such as generating subtitles, cleaning up certain audio problems, reframing footage, and identifying unnecessary pauses. These features can reduce manual effort, particularly for social media and marketing content. However, editors should check caption accuracy, visual consistency, audio quality, and the context of every automated change.
Can AI Make a Rough Cut Automatically?
Yes, some AI video editing tools can automatically assemble an initial cut using transcripts, scene detection, clip-selection features, or editing instructions. However, the quality depends on the footage and the tool's capabilities. AI may miss emotional context, select awkward transitions, or remove important pauses, making human review necessary before the edit progresses.
How to Create a Rough Cut with AI Using InVideo Editor
AI-assisted editing tools can make the initial editing process more accessible to marketers, content creators, and small production teams. InVideo offers online video creation and AI-assisted editing capabilities, although the exact workflow depends on the product and features available in your account. Start with a clear brief, review the generated result, and refine it before publishing.
Step 1: Prepare Your Footage and Editing Brief
Prepare all video clips, voiceovers, images, and supporting assets before editing. A clear brief helps maintain consistency and keeps the video focused on its intended message.
- Gather all source files.
- Identify the target audience.
- Decide the video length and platform.
- Define the main message and call to action.
Step 2: Explore AI-Assisted Editing Features
Explore InVideo’s Rough Cut Editing page to understand its available features. Follow the platform’s current instructions and identify how AI assistance can support your workflow.
- Visit the InVideo Rough Cut Editing page.
- Review available editing features.
- Explore automated editing options.
- Identify tasks that AI can simplify.
Step 3: Review and Improve the Rough Cut
Review the rough cut from beginning to end to ensure the selected clips communicate the intended message. Correct sequencing issues, remove unnecessary footage, and improve pacing before moving forward.
- Check the clip sequence and flow.
- Remove irrelevant or repetitive footage.
- Restore important moments.
- Correct mistakes in the initial edit.
Step 4: Refine and Finalize the Video
Polish the video by improving transitions, captions, audio quality, and visual consistency. Review the exported version carefully to ensure it meets branding requirements and is ready for publication.
- Refine transitions and visual effects.
- Check captions, voiceovers, and audio levels.
- Verify branding and graphic elements.
- Preview the final export before publishing.
Benefits of AI in the Video Editing Workflow
AI can improve video editing efficiency by helping creators complete repetitive tasks more quickly and manage large amounts of footage. For marketing teams, this may support faster content production and easier repurposing across platforms. The greatest benefit comes from combining automation with human creative judgment, rather than relying on AI to make every editorial decision.
Faster Editing and Reduced Manual Work
Automated transcription, caption generation, and searchable footage can reduce the time required for certain routine tasks. Editors can locate relevant dialogue faster and spend less time reviewing lengthy recordings. Actual time savings vary by project complexity, software capabilities, and the quality of the source footage.
More Efficient Collaboration and Feedback
Sharing a rough cut early helps clients and team members review the story before detailed finishing begins. AI-assisted workflows may make it easier to produce review versions and apply straightforward changes. Clear feedback, version tracking, and approval checkpoints help prevent repeated revisions and keep the project aligned with its original objectives.
Greater Consistency Across Video Projects
Teams producing recurring marketing videos can use repeatable editing checklists and brand guidelines to maintain consistency. AI tools may help standardize tasks such as caption generation or reframing, while editors verify the results. This approach supports a recognizable visual identity without sacrificing the creative decisions that make each video relevant to its audience.
Statistics and Market Insights: AI in Video Editing
AI-assisted video production is attracting attention as creators seek faster ways to develop marketing content, educational videos, and social media campaigns. However, market size and adoption figures vary by research methodology and the category being measured. Reliable analysis should distinguish video editing software from broader generative AI markets and cite the original report for each statistic.
AI Adoption in Video Production
Research recent reports from established industry research firms and reputable software providers to understand AI adoption in video creation. Focus on clearly defined measures, such as the percentage of surveyed professionals using AI editing tools or the growth of a specific software market. Include publication dates and methodology to prevent misleading comparisons.
How AI Is Changing Editing Workflows
AI is helping automate selected tasks, including speech transcription, caption creation, scene identification, and content repurposing. These features can be particularly useful for creators managing multiple formats or frequent publishing schedules. Nevertheless, performance differs between tools, and automated results may require substantial correction when footage contains complex dialogue, overlapping speakers, or rapid scene changes.
What These Trends Mean for Video Editors
As routine editing tasks become easier to automate, video editors can place greater emphasis on storytelling, creative direction, audience understanding, and quality assurance. Learning how to use AI effectively may improve productivity, but technical knowledge and editorial judgment remain valuable. Teams should evaluate real project results rather than assuming every AI feature produces measurable savings.
Conclusion
Understanding the difference between rough cut, fine cut, and final cut helps creators build a more organized and effective video editing workflow. A rough cut establishes the story, a fine cut improves its flow, and a final cut completes the approved edit. AI can accelerate tasks such as transcription, clip discovery, and caption generation, while human editors ensure that the finished video remains accurate, engaging, and visually consistent. By combining structured editing stages with suitable AI tools such as InVideo Editor, creators can reduce repetitive work and focus more on producing meaningful content.
Frequently Asked Questions
Q1. What Is the Difference Between a Rough Cut and a Final Cut?
Ans. A rough cut is an initial version of a video that establishes the scene sequence and overall story. A final cut is the approved version, with the necessary editorial decisions and finishing work completed. The rough cut helps teams evaluate the narrative, while the final cut prepares the video for its intended audience and delivery requirements.
Q2. What Is the Difference Between Rough Cut, Fine Cut, and Final Cut?
Ans. A rough cut establishes the initial sequence of footage. A fine cut improves pacing, timing, transitions, and continuity. A final cut represents the approved edit, which is then completed according to the production workflow. These stages help editors move from basic storytelling to a refined, professional video without spending too much time polishing an unapproved sequence.
Q3. What Are the Main Stages of the Video Editing Process?
Ans. The main stages generally include importing and organizing footage, reviewing clips, creating a rough cut, refining the fine cut, completing audio and visual finishing, and exporting the final video. Some productions include additional review and approval stages. The exact workflow varies depending on the project's length, complexity, delivery requirements, and team structure.
Q4. Can AI Make a Rough Cut Automatically?
Ans. Yes, some AI video editing tools can create an initial cut using transcripts, scene detection, clip-selection features, or editing instructions. However, the results depend on the available features and source material. Editors should review the sequence for missing context, awkward timing, and storytelling problems before treating the AI-generated version as a usable rough cut.
Q5. How Does AI Help in the Video Editing Workflow?
Ans. AI can assist with transcription, caption generation, scene detection, silence removal, audio enhancement, and locating relevant footage. Some tools also support AI-assisted assembly or content repurposing. These capabilities can reduce repetitive work, but they do not eliminate the need for creative judgment, accuracy checks, and final quality control.
Q6. How Long Does It Take to Create a Rough Cut?
Ans. The time required depends on the amount of raw footage, the complexity of the story, the editor's experience, and the project's requirements. A short social media video may need much less editing than a documentary or long interview. AI-assisted transcription and clip discovery can help, but complex footage still requires careful review.
Q7. Is a Fine Cut the Same as a Final Cut?
Ans. No. A fine cut is a refined version of the edit in which timing, pacing, and continuity are improved. A final cut is the approved version that moves into or completes the required finishing and delivery process. Some workflows use these terms differently, so production teams should agree on approval stages and deliverables in advance.
Q8. Which AI Video Editing Tool Is Best for Creating a Rough Cut?
Ans. The best tool depends on your footage, budget, editing experience, and desired level of automation. Compare AI-assisted assembly, transcription, captioning, export quality, and creative control. InVideo is one option to explore for online video creation. Test it with a short project and review its current features before choosing a subscription.